How to Uninstall Programs in Windows That Won’t Uninstall?
Struggling to remove a stubborn program from your Windows computer can be a common and frustrating issue. Sometimes, even Microsoft’s official methods, such as using the Control Panel or Settings menu, might not always work as expected. This issue often arises due to corrupted files, incomplete installations, or lingering background processes that prevent uninstallation.
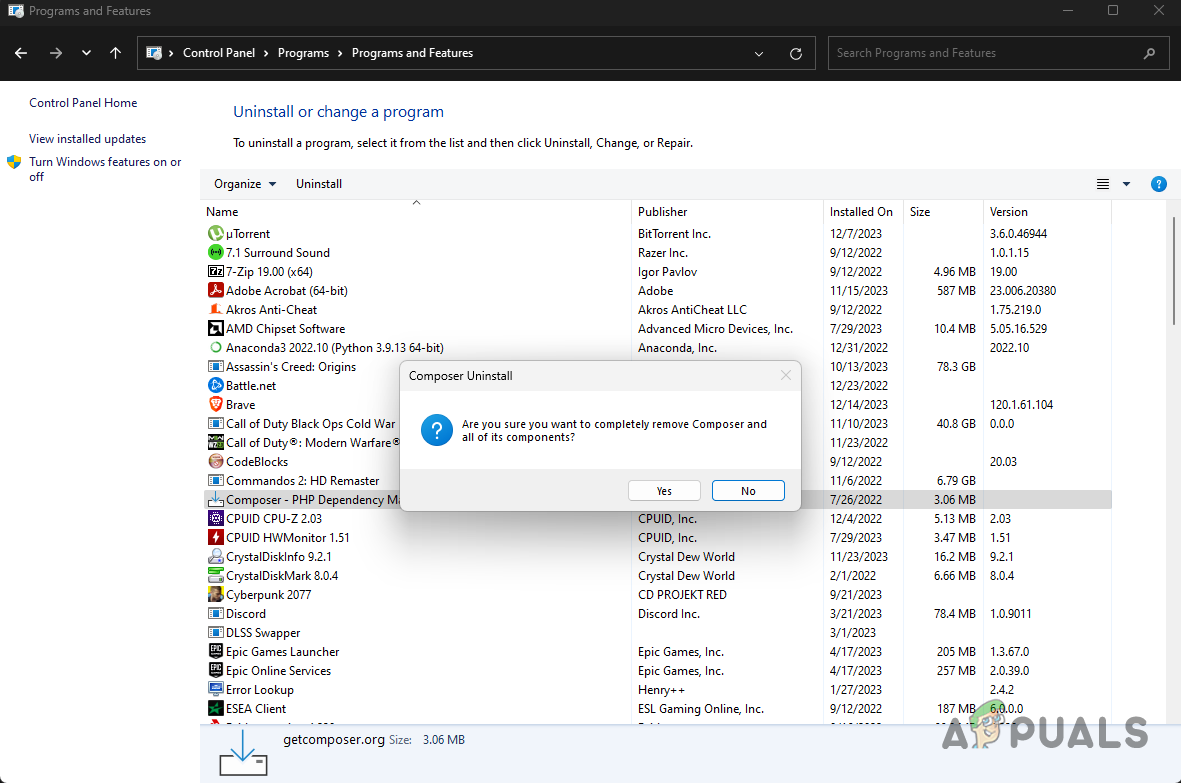
This article outlines various strategies to help you successfully remove a problematic app from your computer.
1. Use the App’s Uninstaller
Most software packages come with their own uninstall utility, which can be particularly useful if the traditional methods via the Control Panel or the Windows Settings app do not work.
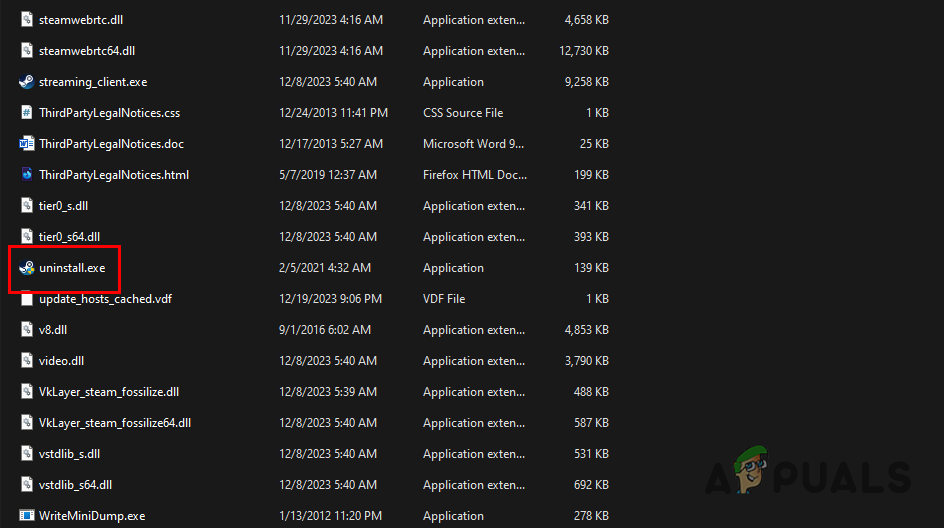
Navigate to the program’s installation folder and look for an uninstall.exe file.
Execute this file to begin the uninstallation process. Be aware that the exact file name might differ depending on the app.
2. Restart the Windows Installer Service
The Windows Installer service plays a key role in the addition, modification, and removal of software. If this service experience problems, it may affect the uninstallation process.
- Press the Win key + R to bring up the Run dialog.
- Enter services.msc into the Run dialog and hit Enter.
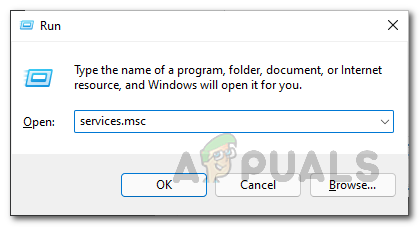
Opening Services Window - The Services window will appear. Locate the Windows Installer service and right-click on it.
- Select Start to initiate the service if it is not running.
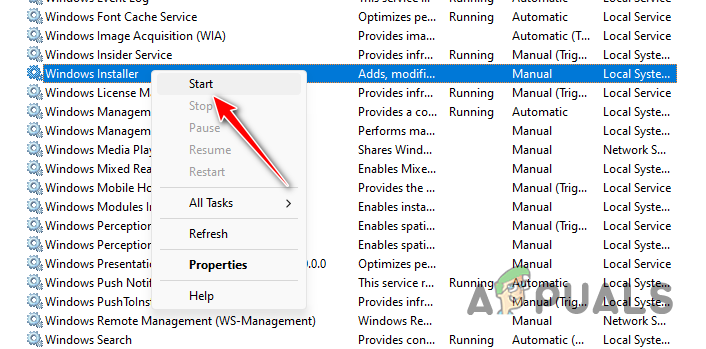
Starting Windows Installer Service - If the service is currently running, restart your computer.
- Attempt to uninstall the app once more to see if the problem has been solved.
3. Uninstall the App via PowerShell
When the typical graphical user interfaces fall short, this command-line powerhouse directly interacts with Windows systems, bypassing any issues that GUI-based methods might encounter. By using specific commands, PowerShell can force remove an application, even if it’s being stubborn, giving you a reliable alternative method to cleanse your system of unwanted software.
- Open the Start Menu, type Windows PowerShell, and select Run as Administrator.
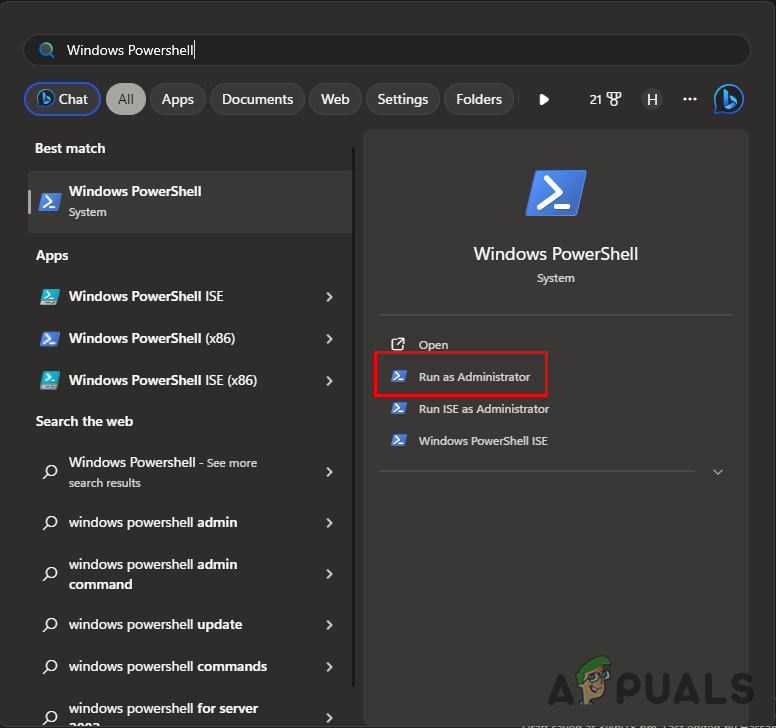
Running Windows PowerShell as Admin - In PowerShell, type the following command, substituting XXX with the name of the program you want to uninstall:
Get-Package -Name 'XXX'
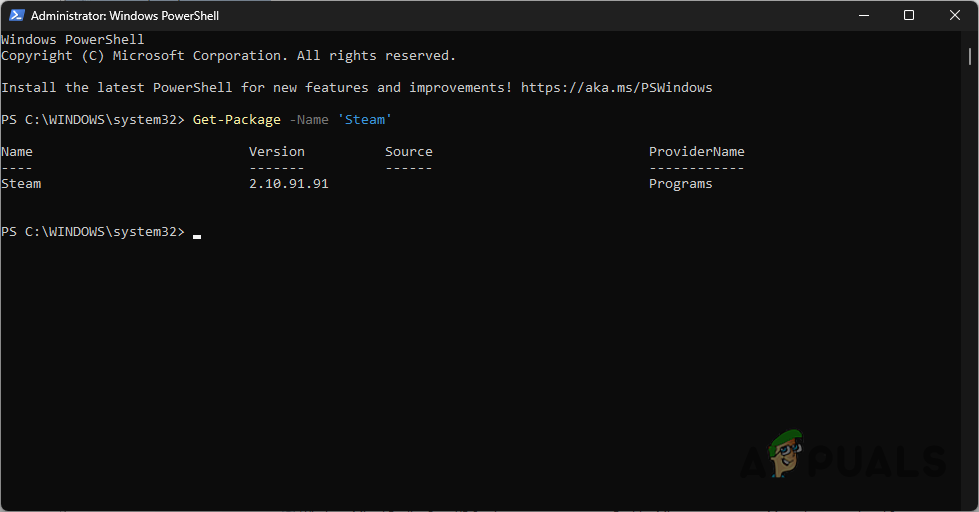
Listing Package with PowerShell - Execute the command below to remove the program:
Uninstall-Package -Name 'XXX' -Force
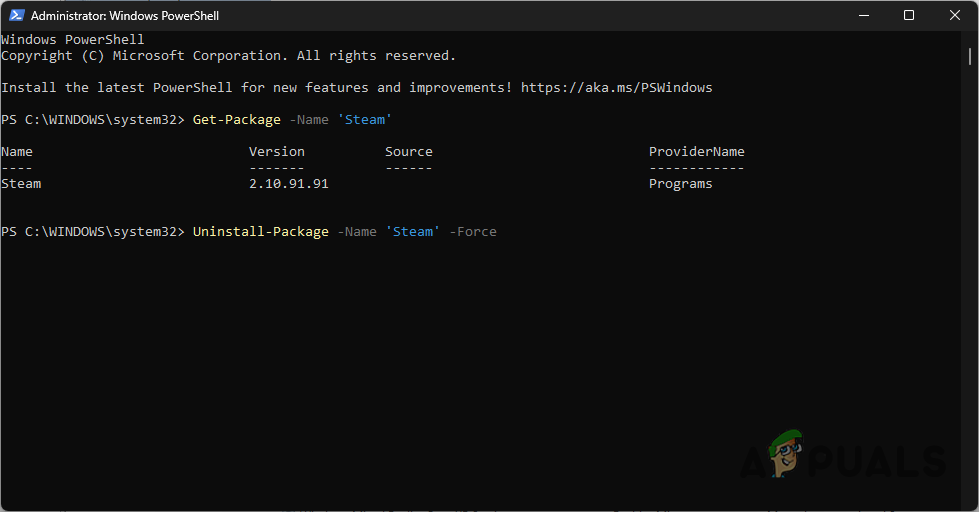
Uninstalling Package with PowerShell
4. Use Safe Mode
This method can often bypass conflicts caused by third-party software or drivers that might be preventing the uninstallation of a program. Safe Mode starts Windows with a minimal set of drivers and services to avoid conflicts from software that starts automatically.
By only launching the essentials, Safe Mode lets you troubleshoot and remove stubborn applications without the interference of extra processes that run in a standard boot-up scenario.
- Press Win key + I to open the Settings app.
- Navigate to System > Recovery.
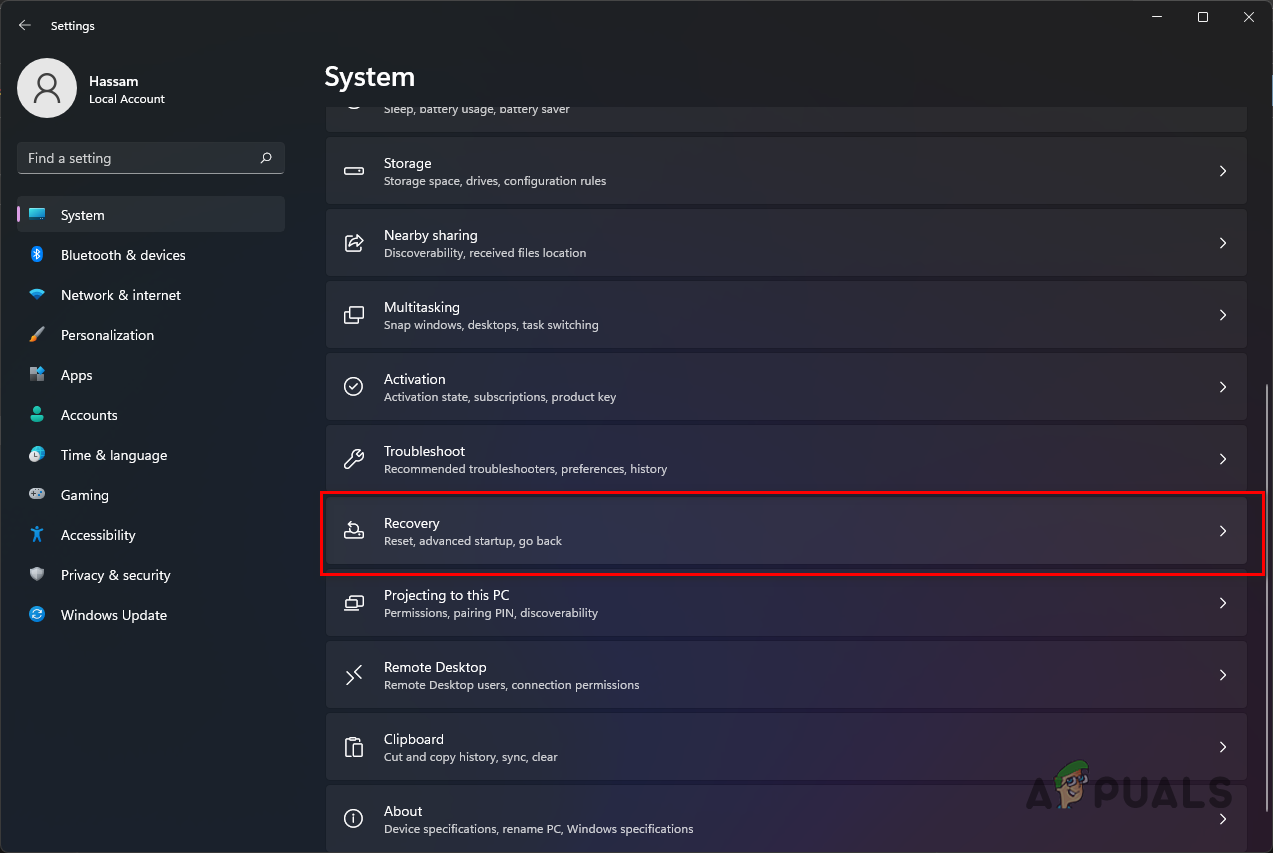
Navigating to Recovery - Select Restart now under Advanced Startup.
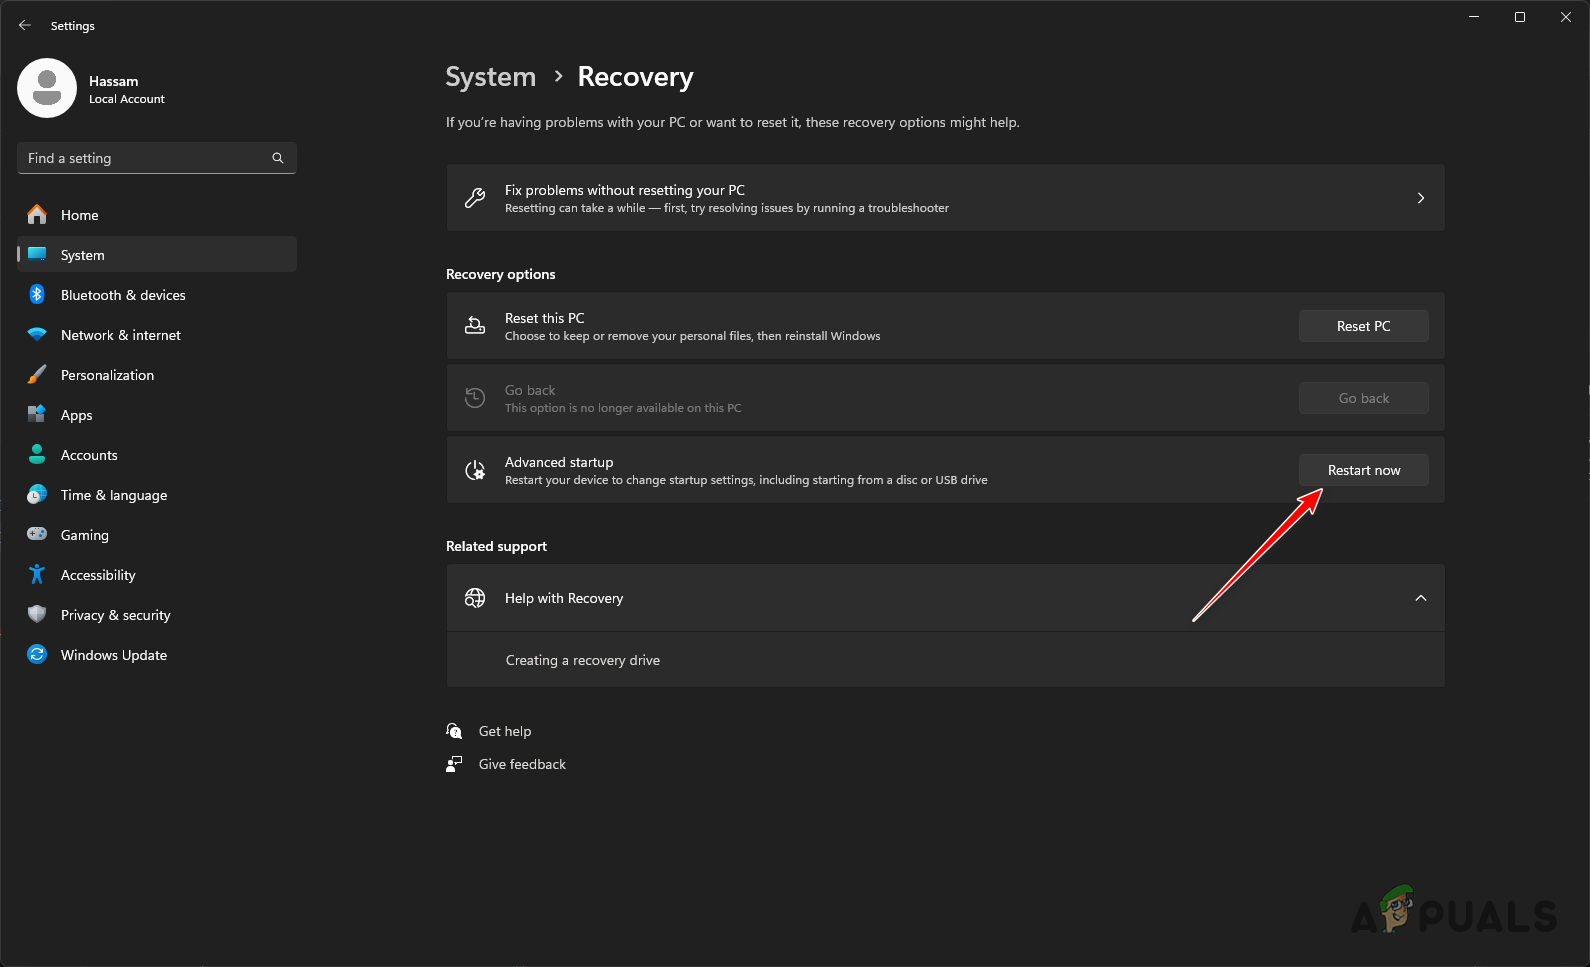
Restarting into Windows Recovery Environment - After rebooting, choose Advanced Options, then Startup Settings, and hit Restart.
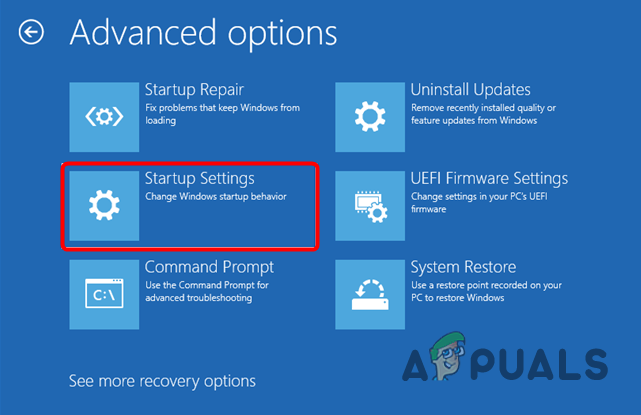
Navigating to Startup Settings - When prompted, press 4 to initiate Safe Mode.
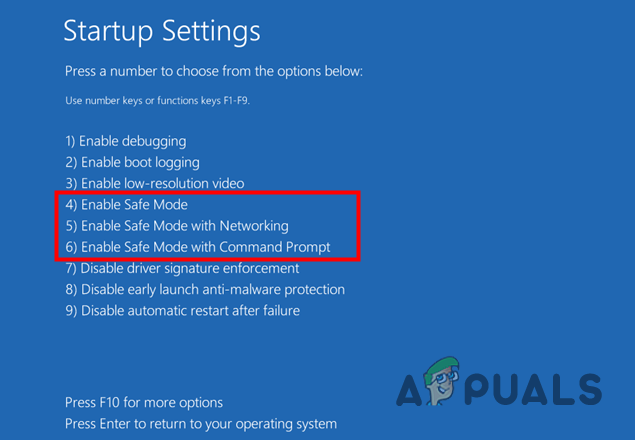
Booting into Safe Mode - Proceed to attempt the uninstallation of the program.